To get coffee out of a wool rug, blot the spill immediately with a clean white cloth, apply small amounts of cold water, blot again, then use a diluted wool-safe cleaner only if the stain remains. Do not rub, soak the rug, use hot water, or apply harsh stain removers before testing in a hidden spot.
Wool rugs need a slower, safer approach than synthetic carpet. The goal is to transfer coffee out of the fibers while keeping the rug as dry and stable as possible. For broader spill-cleaning basics, see our stain removal guide, but treat wool more cautiously than regular carpet.
- What to do immediately after a coffee spill on wool
- What not to use on a wool rug
- How to handle fresh black coffee stains
- What changes if the coffee had milk, cream, or sugar
- How to treat dried coffee stains carefully
- Where helpful products fit into each step
How to get coffee out of a wool rug safely
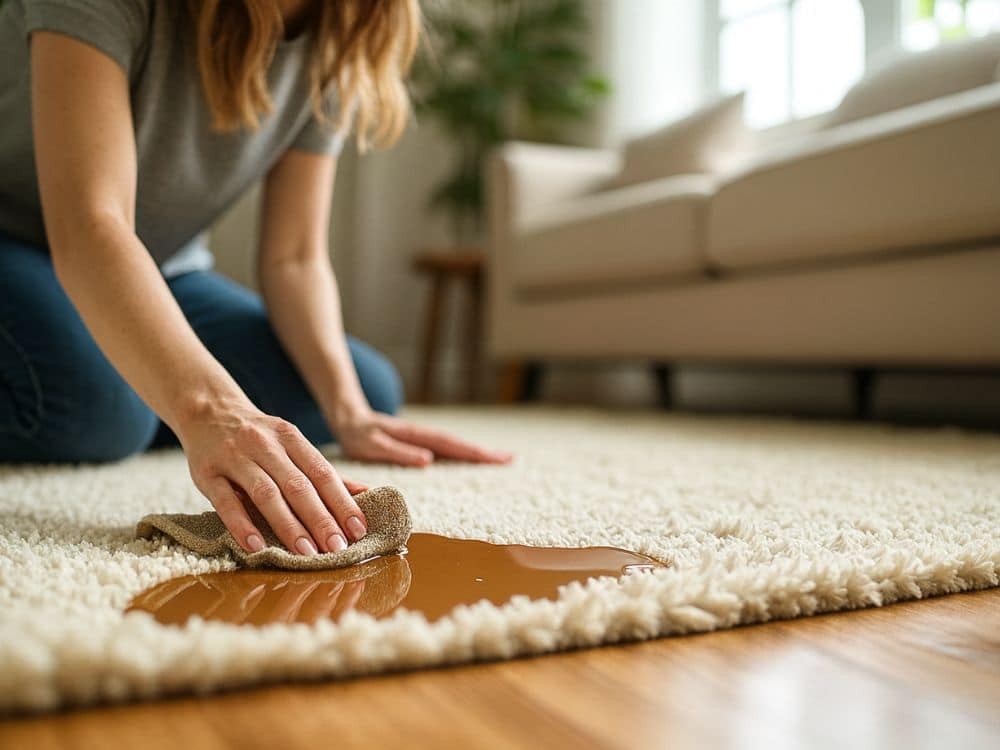
- Blot immediately Press a clean white cloth or white paper towel onto the coffee. Lift straight up and switch to a dry section as liquid transfers.
- Use cold water in small amounts Mist or dab cold water onto the stained fibers, then blot again. Do not pour water through the rug or soak the backing.
- Clean only if the stain remains If blotting and cold water do not fully lift the stain, use a very diluted wool-safe cleaner or mild soap solution after a hidden spot test.
- Rinse away residue Cleaner left in wool can attract dirt and make the area feel sticky. Rinse lightly with a damp cloth and blot thoroughly.
- Dry with airflow, not heat Use towel pressure and gentle airflow. Avoid direct sun, heaters, steam, or hot air because heat can affect wool texture and dyes.
What not to do with coffee on a wool rug
Fresh Coffee Spill Protocol for a Wool Rug
Step-by-step fresh spill cleanup
-
Remove the mug and stop the spread
Move the cup, saucer, or anything wet away from the rug. If the spill is still spreading, place clean white towels around the edge to keep it contained.
-
Blot with a clean white cloth
Press the cloth straight down onto the coffee, hold for a few seconds, then lift. Switch to a clean section each time so you do not transfer coffee back into the fibers.
-
Work from the outside toward the center
Start at the outer edge of the stain and move inward. This keeps the brown mark from expanding across clean wool.
-
Apply cold water lightly
Use a spray bottle or a cloth dampened with cold water. Add just enough moisture to dilute the coffee in the fibers, not enough to wet the rug backing.
-
Blot again until transfer slows
Keep pressing with clean dry cloths until little or no coffee color appears on the towel.
-
Use a mild cleaner only if needed
If a brown tint remains, test a diluted wool-safe cleaner or a tiny amount of mild clear dish soap in a hidden area first. Then dab the stain lightly and blot.
-
Rinse with a damp cloth
Use a separate cloth dampened with plain cold water to remove cleaner residue. Follow with dry towel pressure.
The goal is not to make the rug wet. The goal is to transfer coffee out of the wool while keeping the rug as dry and stable as possible.
Helpful tools for the fresh-spill step

White microfiber cloths make it easier to see whether coffee is still transferring from the rug. They also reduce the risk of adding dye from colored towels while you blot and rinse.
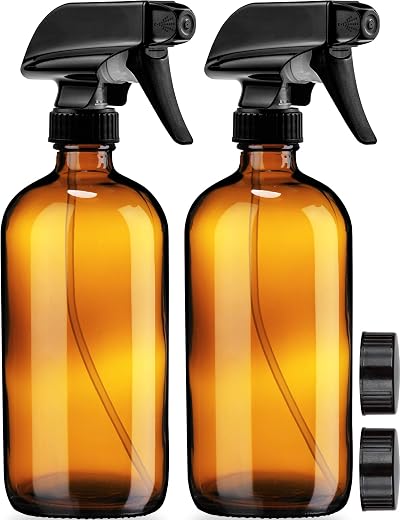
Controlled misting is safer than pouring water onto a wool rug. Use a spray bottle to dampen the stained fibers lightly, then blot with a clean white cloth.
Before applying soap, vinegar, Woolite, dry cleaner powder, or any spot remover to the visible stain, test a tiny amount in a hidden corner of the rug. Stop if color transfers to the cloth, the wool feels rough, or the test spot changes shade.
If the coffee had milk, cream, or sugar
- Blot the liquid first Treat the spill the same way at first: blot coffee out of the wool before adding any cleaner.
- Expect sticky residue Sugar, syrup, or flavored creamer can leave a sticky film that attracts dirt even after the brown color fades.
- Use mild cleaner more carefully A small amount of wool-safe cleaner may be more useful for milky or sweet coffee than plain water alone, but it still needs a hidden spot test.
- Rinse residue thoroughly After cleaning, blot with a cloth dampened with plain cold water so soap, dairy residue, or sugar does not remain in the fibers.
- Watch for odor as it dries If the area smells sour or feels sticky after drying, stop repeating DIY steps and consider professional rug cleaning.
Dried Coffee Stain Protocol for a Wool Rug
Step-by-step dried stain cleanup
-
Vacuum loose residue first
Use suction only, without a beater bar. Remove dry particles before adding moisture to the stain.
-
Soften the stain slowly
Dampen a white cloth with cold water and press it onto the stained area for a few minutes. Do not pour water onto the rug.
-
Blot and check for color transfer
Lift the cloth and check whether brown color is transferring. If it is, continue gentle blotting before using cleaner.
-
Apply a wool-safe cleaner after testing
Use a small amount of diluted wool-safe cleaner or a low-moisture rug cleaner according to the label. Keep the application controlled.
-
Avoid strong oxidizers and bleach
Do not use bleach, strong oxygen cleaners, or harsh all-purpose stain removers unless the label clearly says they are safe for wool and your hidden test looks normal.
-
Rinse lightly
Use a cloth dampened with plain cold water to remove residue, then blot dry with fresh towels.
-
Stop if the rug changes texture or color
If the rug feels stiff, sheds color, smells musty, or develops a ring, stop DIY treatment and call a professional wool rug cleaner.
If you are comparing stain behavior across different household spills, this related guide on stubborn fruit stains explains why pigment-based stains often need careful blotting and staged treatment rather than force.
Helpful products for dried or lingering coffee marks

This type of product fits best after the urgent spill response, not before it. Use it only according to the label, test first, and avoid aggressive brushing on delicate wool.

Use a spot cleaner cautiously on wool. Test in a hidden area, apply a small amount, avoid over-wetting, and rinse residue with a damp white cloth after treatment.
Rinse and Dry the Wool Rug Safely
Safe rinse-and-dry checklist
Optional extraction tool for moisture or residue

For wool rugs, extraction should be gentle and controlled. Avoid heat or steam, do not over-wet the rug, and use suction mainly to remove moisture after a careful spot treatment.
When to call a professional wool rug cleaner
Treat wool gently and place each product where it actually helps
- Blot first with clean white cloths
- Use cold water, not hot water
- Avoid rubbing, soaking, bleach, steam, and harsh cleaners
- Spot test every cleaner before visible use
- Rinse residue so the cleaned area does not attract dirt later
- Call a professional for valuable, delicate, old, or returning stains
The safest way to get coffee out of a wool rug is to blot immediately, use cold water in controlled amounts, clean only after testing, rinse away residue, and dry the rug thoroughly with airflow and towel pressure. Helpful products should support the exact step you are doing, not replace careful technique.